Brewing in a Bag (BIAB) Method
Brew in a Bag Brewing.
After successfully brewing with kits, many brewers feel the urge/need to move on to all grain brewing. This is brewing using the same techniques that commercial breweries use, but on a smaller scale and with less complicated equipment and procedures. It allows the brewer to either make a beer that is specifically matched to their own personal tastes, or that mimics a well known commercial brew.
The downside of traditional, "Three Vessel" all grain brewing is that it requires a lot of additional equipment and takes between 5-7 hours to complete the process to the point of being able to pitch the yeast in order to start the fermentation. A slightly less complicated process, but one which provides more satisfaction than "Malt Extract Brewing" is one known as "Brew in a Bag" or "BIAB" brewing, which uses less equipment, fewer procedures and only takes around 3½-4 hours.
In essence, brewing from grain using the "Brew in a Bag" method requires the following steps:
- The brewing water is treated to remove any chlorine and excessive hardness and match the water used in the beer style being brewed.
- The water is heated to around 72°C in a boiler.
- The grain is mixed into hot water in a grain bag suspended in the boiler and left for around 60-90 minutes at approx 65°C to convert the stored carbohydrates into usable sugars. This is known as Mashing.
- The bag (and all the grain in it) is removed from the boiler and the remaining Liquid, the Wort, is brought to the boil.
- Hops are added and boiled for 60-90 minutes to extract the bitterness.
- The liquid is rapidly cooled and run off into your fermentation vessel ready for the yeast to be added.
- Fermentation, clearing, storage and conditioning then take place as per normal.
In practice, it works like this:
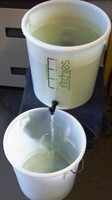
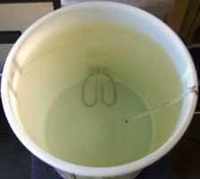
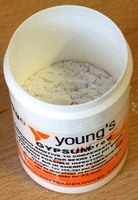
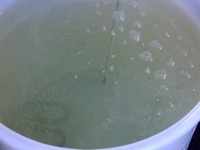
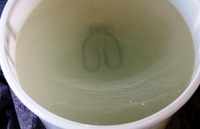
1) In Colchester, we have fairly hard water which often contains high levels of chlorine, so I start by running 25ltrs of tap water into my boiler and adding a level teaspoon of Gypsum, before bringing it to the boil and allowing it to boil for around 30 minutes to drive off the chlorine and help to remove the limescale. If you live in a soft water area, you probably won't need to do this, but the layer of "scum on the water surface in the 4th picture below shows you why I have to do it....
 |  |  |  | |
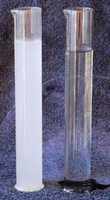 | The water is left to cool overnight water to encourage the dissolved limescale (Calcium Carbonate) to drop out of solution. These two trial jars contain the treated water on the right and the sediment filled dregs on the left... The following morning, the cleared water is run off, leaving the sediment behind. As I am brewing a bitter in this process, a teaspoon of Epsom Salts (Magnesium Sulphate) is now added to the brewing water, or Liquor as brewers call it, to increase the pH level to that needed to ensure an efficient mash. The boiler is then rinsed to remove the sediment. If you have access to a water analysis from your local water board, you can treat the water using AMS/CRS and DWB/DLS which avoids the time, effort and cost of boiling the water. | 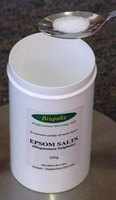 |
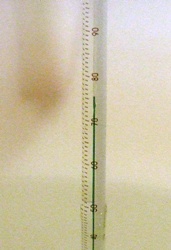
2) After treatment, you should have around 23ltrs of the liquor. This is returned to the boiler and heated to 72-75°C and, whilst this is happening, I weigh out the grain mix as per the recipe. The bulk of the grain mix is made up of crushed pale malt which provides the fermentable sugars which are going to extracted during the mashing process. Most beers contain varying amounts of coloured malts which are used to add colour and flavour. In this recipe, which aims to replicate a Ruddles County style ale, the only additional colour and flavour are provided by a small amount of Crushed Crystal Malt. The grain is weighed out and then thoroughly mixed to give an even distribution of the crystal malt and a consistent colour.
 |  | 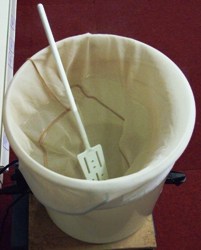 | 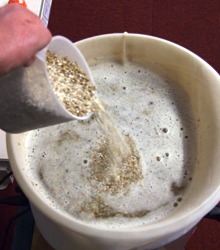 | 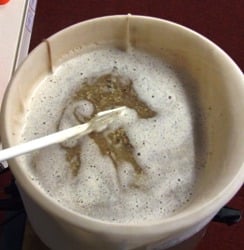 |
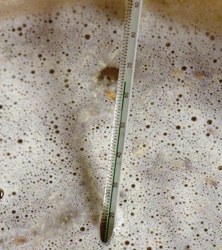
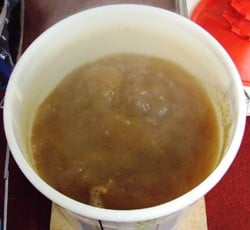
3) The grain bag is added to the boiler and the grain is gradually poured in and stirred to ensure no lumps form. When all of the grain has been added, the mixture should have the consistency of a thick porridge. By this time, the mixture should have stabilised at around 65°C. The heater setting on the boiler is adjusted so as to maintain this temperature without actually increasing the heat and is left to "Mash" for 60-90 minutes. During this period, the starch in the grain is converted to fermentable sugars. I would normally "Mash" for 90 minutes, but most of the starch conversion will be complete within 60 minutes (especially as this is a lower volume/looser mixture than would normally be "Mashed" in a traditional Mash Tun), so you can normally start the next process after 60 minutes if you are short of time.
 |  |  |
4) At the end of the desired "Mash" time, remove the grain bag and allow it to drain into the bucket and bring the wort to the boil. One of the advantages of the "Brew in a Bag" method is its simplicity, but there is a trade off in efficiency compared to the "Three Vessel" method in that there is a lot of liquid "lost" to the grain, so your brewing volume reduces at every stage. If you have mashed in a 23ltr volume of water, you will probably only have about 19ltrs left over by the time you remove the grain from the mash. Some brewers are happy with this, but others prefer at this point to place the grain (still in its bag) into another fermenter and slowly and gently rinse with a couple of kettles of boiled water to extract some more wort to add back to the boiler to top up the boil level. It's a matter of personal choice.
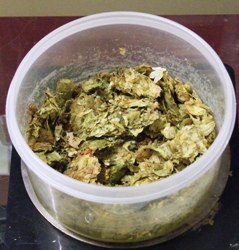
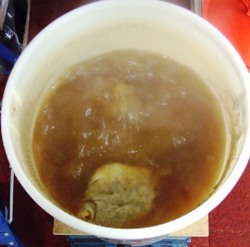
5) Whilst the wort is coming to the boil, the Main Boil hops are weighed out and added to a Muslin Bag. (If you have a hop filter fitted to your boiler, you can add the hops loose, but in this batch, I didn't have one fitted so needed to constrain the hops to avoid them blocking the tap later in the process.) As soon as the wort reaches a full rolling boil, which usually happens at a temperature of around 100-105°C, the first batch of hops are added. Hops need to be boiled for around 60-90 minutes to extract the full bittering compounds. Each hop variety has different flavour and bittering properties and the amount of bitterness you can obtain from it is determined by its "Alpha Acid" level. The higher this is, the less of the hop you need to achieve the desired bitterness level. (In Europe, this is usually expressed as the EBU of the beer). Unfortunately, a long boil to extract the bitterness also destroys many of the flavour and aroma properties of the hop, so it is common practice to add a second batch of hops about 15 minutes before the end of the boil to replace these elements in the finished brew. These are known as the "Late Boil Hops". An odd substance called "Irish Moss", which is actually a form of dried seaweed, is added at the same time because it helps to produce an effect known as the "Hot Break". This is where the proteins that would otherwise lead to a cloudy beer are coagulated and start to clump together.
 |  |  |  |
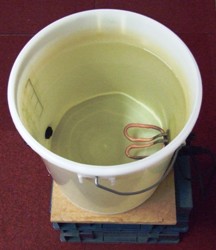
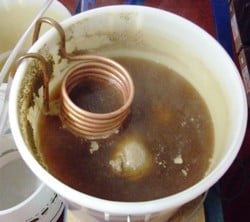
6) In order to prevent infection of the wort and to cause an effect known as the "Cold Break", during which all the material that has clumped together during the "Hot Break" falls out of suspension, it is essential that it is cooled as quickly as possible. I use a simple immersion chiller that is added to the boiler at the same time as the Irish Moss. This acts as a simple heat exchanger and is normally connected directly to a cold water tap, but, as I don't have conveniently accessible running water in my unit, I use a 60ltr bucket filled with cold water as my cooling reservoir and feed the cooler via gravity. Alternatively, you can leave it to cool overnight if it is covered, but this may affect the later clarity.
When the boil has finished, the first 10ltrs of cooling water that come through the chiller are around 70°C. If you collect this in one bucket, then collect the next 20-25ltrs (which will average out at about 40°C) in a separate bucket, and finally collect the last 10-15ltrs in the first bucket, the temperature of all this cooling water will average out at about 40°C and you will have plenty of warm water to use for washing all your equipment.
I adjust the flow rate of the cooling water to around 1½-2ltrs per minute, so it normally takes around 30-40 minutes to cool my wort to 20-25°, depending on the feed water temperature. This can vary from 17-20°C if I'm brewing in the summer to as low as 10°C in winter. The lower the feed water temperature, the faster the wort will be cooled. When the correct temperature has been reached (20-24°C), the hops and proteins thrown out of suspension during the "hot" and "cold" break points will have settled on the bottom of the boiler. This is known as the "Trub".
 | 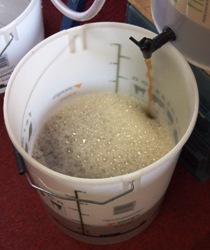 |  |
7) The tap on the boiler can now be opened and the wort run off into a cleaned and rinsed fermentation vessel. The churning that happens during this run-off will cause lots of air to be absorbed into the wort, which aids the yeast in its reproduction stage. When the fermenter is full, the gravity is checked, in this case it was 1042 which was exactly what I was aiming for, and yeast is added and fermentation, racking, bottling/barrelling and conditioning continue as normal. Some brewers use specific named liquid yeast varieties to try to further match the brew being made, but I tend to use a general all purpose ale yeast such as Muntons Gold or Safale 04 as I always have both of these in stock in the shop.
If you would like a copy of these instructions for your own use you can download a PDF copy.

